Caring for Classic
Game Hardware & Cartridges
During the years of collecting Vintage Game System ,
friends and collectors alike come across the fact the some of these consoles
, controllers and cartridges need a good cleaning.
Us ourselves have purchased some games from eBay and Yahoo
Auctions that people say don't work and with a little extra treatment
besides the basics work A+.
Also controllers like Joystick and Paddles that give you
such a headache for not working or the paddles doing the famous "Flutter"
when playing Kaboom ! or Breakout .
Well hopefully think the upcoming text will help you out a
bit. You don't have to be a Rocket Scientist to do a simple fix and care
for these games and hardware. We are not saying that the problems are
bigger like the ROM's being bad or something internal with the console. But
if the problem is minor, maybe it will help.
These fix-its can work with most any game cartridge and
consoles (i.e. Intellivision, Colecovision , etc.) but all controllers are
different and we will be covering them in months to come.
Here is a list of items that will help you in the care and
maintenance of your classic systems. They are easily obtained at any Radio
Shack or Electronic / Hardware Store. We included Radio Shack catalog
numbers for easy reference.
Static electricity from your body or
hands can destroy or seriously degrade the performance of sensitive IC's ,
ROM's and PC Boards and their circuitry . More so those used in Computers
and Video Games (especially those in these vintage consoles and
cartridges). The products above provide a cost-effective way
(The highest priced item is the Kit at $19.99)
to eliminate damage due to ESD (Electrostatic
Discharge) during disassembly , cleaning and repair.
Now we will begin the basic care of Atari 2600/5200/7800/XE
and computer cartridges. But these hints will work on most any classic
video game cartridges. Now on with the show !!!!
-
Game Cartridge
Maintenance Cleaning & Care
As most of you know by now there are 2 types of cartridge
for the Atari 2600/5200 & 7800 , open front and closed front. Let take care
of the easy ones (Open Front) first.
To view larger pictures below, click on
the pictures .
First make sure you are grounded
(WE STRESS THIS).
-
Take a flashlight and look at the contacts. You should
see some oxidation on the gold tips of the board.
-
Take a Q-Tip soaked in rubbing alcohol and lightly rub it
on the contacts of the cartridge.
-
View the Q-Tip. You should see black colored residue on
the cotton. This is the oxidation and dust coming off.
-
Take the dry side of the Q-Tip and wipe the contacts again
to take off the extra alcohol. This will also take off any extra dust or
oxidants.

-
Let the game cartridge sit and dry for about 15 minutes.
-
Now try out the game. If it works , you are done ! I
like to take a Q-Tip with a little DeoxIT™ on it a wipe
gently over the contacts of the cartridge. This solution leaves a thin
organic layer that protects against oxidation.
Now suppose you did what was describe
and the game cartridge still didn't work. Well we now go to Round 2
-
Take the Acrylic Nail Buffing Board and
soak the one end in rubbing alcohol. The board is really extra, extra
fine grit (1500 to 2000) and takes deep oxidation out of the contacts.
-
Rub the soaked board gently on the
contacts of the cartridge. CAUTION: Please
rub gently and lightly because rubbing too hard can break the contacts and
circuit etch in the board of the cartridge and can render the game useless
!
-
Remove the board and you should see
black residue on it. That again is the board deep cleaning the contacts.
-
Wipe the contacts clean with a Q-Tip to
take the excess alcohol off and whatever contaminates off.
-
Again let the cartridge sit for 15
minutes to dry.
-
If everything is ok, take a little DeoxIT™ and use it as described above in line
VI.
-
Test the game out, now hopefully it
works. If it doesn't, it can be a dead cartridge.
Some people like to use warm water to
clean the contacts. Water against metals causes oxidation and is a major
No-No in cleaning the games. Rubbing Alcohol is a light solvent and causes
no effects against the circuitry .
One thing is to make sure the game
cartridge is level when cleaning so nothing run into the cartridge towards
the ROM. Although it's very safe for the components , no one wants to take
chances.
-
Opening
Closed Front Atari Cartridges
Ok, everyone who is new to this looks at
that Atari cartridge door and sighs, "How does it open?" . Well it isn't
that difficult. The 2 prongs on the game post on the consoles release the
door on the cartridge and expose the contacts of the PCB of the cartridge to
the contacts of the game port .
To open the cartridge's door , take a
Jeweler's screwdriver and next to the prong on the game cartridge is a small
hole. These are on the left and right of the cartridge door. Insert the
driver in about 3/8" and push the plastic of the door downwards into the
cartridge. This releases the spring and exposes the cartridge's PCB
contacts. I usually hold my index finger to the side between the cartridge
and the PCB for keeping it open for cleaning.
I found that if you wedge something
between then, it can break the door's mechanism or make in out of line and
then it would take opening the cartridge and destroying the top label.
So these are a few hints we use to clean
and maintain the cartridges. If we find out something new and useful from
visitors and collectors, we will print it here. I am going to include
photos of us doing these procedures in a few days.
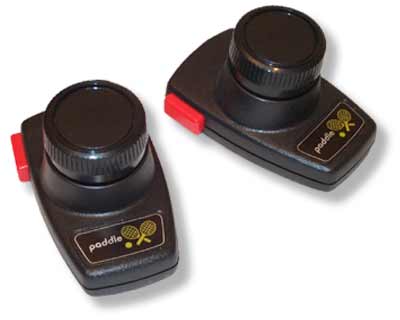
For our next
installment "Cleaning & Caring For Atari Paddle Controllers" Click the
paddle controllers below !

Click The
Paddle To View The Next Page
Click
here to go back to our home page
